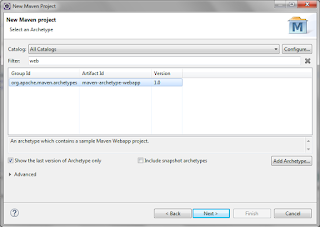
First we start with Maven quickstart project
1. Open Eclipse
2. Click on File -> New -> Other...
3. Select Maven Project
4. Next
5. Select quickstart
6. Write the name of your project
7. Finally this is the structure of your Maven project, it is very easy
Now we continue with a Maven web project
Repeat the steps from 1 to 4, later
5. Select Maven webapp
Repeat the 6 step, later
7. This is the structure of Maven web project
8. Add to pom.xml the javax.servlet dependencies as seen below
 <project xmlns="http://maven.apache.org/POM/4.0.0" xmlns:xsi="http://www.w3.org/2001/XMLSchema-instance"
  xsi:schemaLocation="http://maven.apache.org/POM/4.0.0 http://maven.apache.org/maven-v4_0_0.xsd">
  <modelVersion>4.0.0</modelVersion>
  <groupId>com.co</groupId>
  <artifactId>myPorject</artifactId>
  <packaging>war</packaging>
  <version>0.0.1-SNAPSHOT</version>
  <name>myPorject Maven Webapp</name>
  <url>http://maven.apache.org</url>
  <dependencies>
   <dependency>
    <groupId>junit</groupId>
    <artifactId>junit</artifactId>
    <version>3.8.1</version>
    <scope>test</scope>
   </dependency>
   <dependency>
      <groupId>javax.servlet</groupId>
      <artifactId>javax.servlet-api</artifactId>
      <version>3.1.0</version>
    </dependency>
    <dependency>
      <groupId>javax.servlet</groupId>
      <artifactId>jstl</artifactId>
      <version>1.2</version>
    </dependency>
  </dependencies>
  <build>
   <finalName>myPorject</finalName>
  </build>
 </project>
9. Then right click on project and select properties, select java build path, and delete the packages that have been forgotten.
10. Right click on project and select properties, click on Add folder select main path, click on create new folder and call it java
11. Finally this is the structure of your Maven web project.


No comments:
Post a Comment