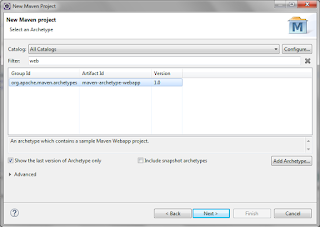
1. We create a Maven Project, see the post How to create a maven quickstart project and a maven web project with Eclipse, Java
In this example we create a project called LogFourJ.
The structure of the project is as seen below
2. In the Pom.xml file include the dependency for log4j as seen below
 <project xmlns="http://maven.apache.org/POM/4.0.0" xmlns:xsi="http://www.w3.org/2001/XMLSchema-instance"
  xsi:schemaLocation="http://maven.apache.org/POM/4.0.0 http://maven.apache.org/xsd/maven-4.0.0.xsd">
  <modelVersion>4.0.0</modelVersion>
  <groupId>com.co</groupId>
  <artifactId>LogFourJ</artifactId>
  <version>0.0.1-SNAPSHOT</version>
  <packaging>jar</packaging>
  <name>LogFourJ</name>
  <url>http://maven.apache.org</url>
  <properties>
   <project.build.sourceEncoding>UTF-8</project.build.sourceEncoding>
  </properties>
  <dependencies>
   <dependency>
    <groupId>log4j</groupId>
    <artifactId>log4j</artifactId>
    <version>1.2.17</version>
   </dependency>
  </dependencies>
 </project>
3. Create an xml file called log4j.xml, this xml file must contain the next code
 <?xml version="1.0" encoding="UTF-8" ?>
 <!DOCTYPE log4j:configuration SYSTEM "log4j.dtd">
 <log4j:configuration debug="true"
  xmlns:log4j='http://jakarta.apache.org/log4j/'>
  <appender name="file" class="org.apache.log4j.RollingFileAppender">
   <param name="append" value="false" />
   <param name="maxFileSize" value="10KB" />
   <param name="maxBackupIndex" value="5" />
   <!-- For Tomcat -->
   <param name="file" value="C:\\log4j.log" />
   <layout class="org.apache.log4j.PatternLayout">
  <param name="ConversionPattern"
   value="%d{yyyy-MM-dd HH:mm:ss} %-5p %c{1}:%L - %m%n" />
   </layout>
  </appender>
  <root>
  <level value="ERROR" />
  <appender-ref ref="file" />
  </root>
 </log4j:configuration>
In this example we'll save the log in the C path, its name is log4j.log, As we can see below:
<param name="file" value="C:\\log4j.log" />
If we use some webserver like tomcat the path can be this:
<param name="file" value="${catalina.home}/logs/myStruts1App.log" />
You can tell it if the log will be overwrite or not overwrite, if the value is true the log will be overwrite and if the values is false the log will be not overwrite.
<param name="append" value="true" />
Yo can tell it the max file size too, if the file reached the maximum size the system create a copy and clean the log file and it start write since of first line.
<param name="maxFileSize" value="10KB" />
The values can be KB, MB, GB, etc.
Here an explain of the sintaxis:
1. %d{yyyy-MM-dd HH:mm:ss} = Date and time format, refer to SimpleDateFormat JavaDoc.
2. %-5p = The logging priority, like DEBUG or ERROR. The -5 is optional, for the pretty print format.
3. %c{1} = The logging name we set via getLogger(), refer to log4j PatternLayout guide.
4. %L = The line number from where the logging request.
5. %m%n = The message to log and line break.
Reference:
Finally We'll do a test in the app class
 package com.co.LogFourJ;
 import org.apache.log4j.Logger;
 public class App
 {
      final static Logger logger = Logger.getLogger(App.class);
   public static void main( String[] args )
   {
     logger.error("Ths is an error!!!");
   }
 }
Now you can check the log4j.log file located in the C folder.
References:
https://www.mkyong.com/logging/log4j-hello-world-example/
https://www.mkyong.com/logging/log4j-xml-example/


