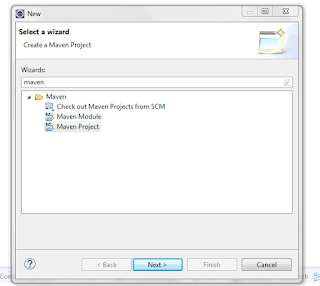
1. We'll create a maven web project, in this example we'll name it RestMaven.
2. We edit the pom.xml file as follows
 <project xmlns="http://maven.apache.org/POM/4.0.0" xmlns:xsi="http://www.w3.org/2001/XMLSchema-instance"
  xsi:schemaLocation="http://maven.apache.org/POM/4.0.0 http://maven.apache.org/maven-v4_0_0.xsd">
  <modelVersion>4.0.0</modelVersion>
  <groupId>com.co</groupId>
  <artifactId>RestMaven</artifactId>
  <packaging>war</packaging>
  <version>0.0.1-SNAPSHOT</version>
  <name>RestMaven Maven Webapp</name>
  <url>http://maven.apache.org</url>
  <dependencies>
   <dependency>
     <groupId>junit</groupId>
     <artifactId>junit</artifactId>
     <version>3.8.1</version>
     <scope>test</scope>
    </dependency>
    <dependency>
     <groupId>javax.servlet</groupId>
     <artifactId>javax.servlet-api</artifactId>
     <version>3.1.0</version>
    </dependency>
    <dependency>
     <groupId>javax.servlet</groupId>
     <artifactId>jstl</artifactId>
     <version>1.2</version>
    </dependency>
    <dependency>
      <groupId>com.sun.jersey</groupId>
      <artifactId>jersey-server</artifactId>
      <version>1.9</version>
   </dependency>
  </dependencies>
  <build>
   <finalName>RestMaven</finalName>
  </build>
  </project>
3. Right click on project, select Properties -> Java Build Path and latter we remove the following directories:
4. In the same window we create a java folder as we can see in the next picture
5. Right click on project -> Properties -> Project Facets and we mark JAX-RS option as follows
6. Now we create a package in Java folder that we created in the 4 step.
com.co.RestServices.controller.controller
This package you can name it when you want.
7. We edit the web.xml file as follows
 <?xml version="1.0" encoding="UTF-8"?>
  <web-app xmlns:xsi="http://www.w3.org/2001/XMLSchema-instance"
    xmlns="http://xmlns.jcp.org/xml/ns/javaee"
    xsi:schemaLocation="http://xmlns.jcp.org/xml/ns/javaee http://xmlns.jcp.org/xml/ns/javaee/web-app_3_1.xsd"
    id="WebApp_ID" version="3.1">
  <display-name>Archetype Created Web Application</display-name>
  <welcome-file-list>
       <welcome-file>index.html</welcome-file>
       <welcome-file>index.htm</welcome-file>
       <welcome-file>index.jsp</welcome-file>
       <welcome-file>default.html</welcome-file>
       <welcome-file>default.htm</welcome-file>
       <welcome-file>default.jsp</welcome-file>
    </welcome-file-list>
    <servlet>
       <servlet-name>RestMaven</servlet-name>
       <servlet-class>com.sun.jersey.spi.container.servlet.ServletContainer</servlet-class>
       <init-param>
         <param-name>com.sun.jersey.config.property.packages</param-name>
         <param-value>com.co.RestServices.controller.controller</param-value>
       </init-param>
       <load-on-startup>1</load-on-startup>
    </servlet>
    <servlet-mapping>
       <servlet-name>RestMaven</servlet-name>
       <url-pattern>/rest/*</url-pattern>
    </servlet-mapping>
  </web-app>
8. We create a Class for management the rest service, in this example we'll calle it RestMain
 package com.co.RestServices.controller.controller;
 import javax.ws.rs.FormParam;
 import javax.ws.rs.POST;
 import javax.ws.rs.Path;
 import javax.ws.rs.Produces;
 import javax.ws.rs.core.MediaType;
 import javax.ws.rs.core.Response;
 @Path("/")
 public class RestMain {
      @POST
      @Path("/postMain")
      @Produces(MediaType.APPLICATION_JSON)
   public Response postMain(@FormParam("value") String value) {
      String response = "{'Message': '"+value+"'}";
      return Response.ok(response, MediaType.APPLICATION_JSON).build();
   }
 }
9. Now we can try the rest service, in this example we use Google Advanced REST client.


No comments:
Post a Comment